
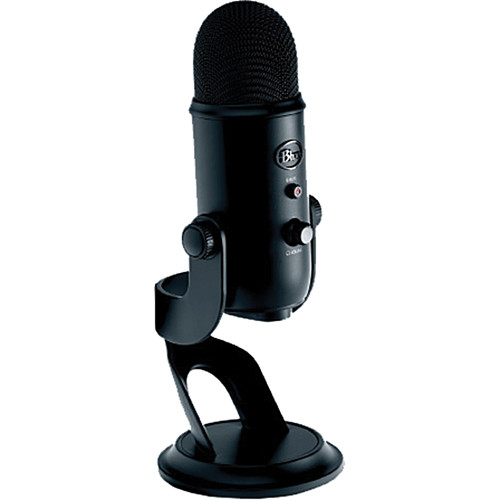
Are you ready to elevate your audio game with the Blue Yeti USB microphone on your Windows 10 PC? Look no further! In this guide, we’ll delve into essential tips and troubleshooting techniques to ensure you make the most out of this excellent choice in the world of USB microphones.
1. Setting up the Basics
In the initial phase of mastering your Blue Yeti USB microphone on Windows 10, establishing a strong foundation is key. The first step in this journey involves the installation of essential drivers. The importance of this cannot be overstated, as it sets the stage for optimal performance and helps ward off any potential recognized errors.
To kickstart this process, head over to the official Blue Yeti website or, alternatively, check your device manufacturer’s website. Here, you’ll find a dedicated section for downloads, housing the latest versions of the required drivers. Downloading and installing the most up-to-date drivers not only guarantees seamless functionality but also unlocks any potential enhancements or bug fixes introduced in the latest updates.
This initial setup is akin to laying the groundwork for a sturdy structure. Just as a building needs a solid foundation, your Blue Yeti experience begins with these crucial drivers. Skipping or neglecting this step might lead to various issues down the road, including compatibility problems, erratic behavior, or even complete malfunctions.
Investing a little time in this foundational setup pays off handsomely in the long run, ensuring your Blue Yeti is ready to deliver top-notch audio performance on your Windows 10 system. So, let’s dive into the specifics of this process, setting the stage for a hassle-free and enriching experience with your Blue Yeti USB microphone.
2. Checking Default Device and Windows Sound Settings
Now that you’ve laid the groundwork by installing the necessary drivers, the next critical step in mastering the Blue Yeti USB microphone on Windows 10 involves fine-tuning your system’s sound settings. This not only ensures that your Blue Yeti is recognized as the primary audio device but also allows you to tailor the audio output to meet your specific preferences.
To embark on this journey of audio optimization, navigate to the Control Panel on your Windows 10 system. Within the Control Panel, seek out the “Sound” settings—a centralized hub where you can configure various aspects of your audio devices.
Once you’ve entered the Sound settings, your goal is to establish the Blue Yeti as the default device for both recording and playback. Why is this crucial? Designating the Blue Yeti as the default device ensures that any audio input or output defaults to this high-quality USB microphone. It’s a simple but essential step in streamlining your audio setup, avoiding potential conflicts with other devices, and ensuring that your Blue Yeti takes center stage in delivering superior sound.
Now, let’s delve into the specifics of this process. Within the Sound settings, you’ll encounter a list of available devices for both recording and playback. Locate your Blue Yeti in the lineup and right-click on it to reveal the option to set it as the default device. This straightforward action solidifies your Blue Yeti as the go-to microphone for any recording needs and ensures that the playback is channeled through this premium USB mic.
But our journey into sound optimization doesn’t end there. To further enhance audio quality, pay attention to the sample rate settings. Adjusting the sample rate allows you to fine-tune the quality of audio recording and playback. Higher sample rates generally result in clearer, more detailed audio, while lower rates can be suitable for specific scenarios. Experiment with different sample rates to discover the setting that best complements your preferences and the nature of your audio recordings.
By taking the time to navigate through the Control Panel and optimize your Windows Sound settings, you’re actively shaping the audio landscape of your Blue Yeti experience. This level of customization ensures that your USB microphone isn’t just a device; it’s a tailored audio solution designed to meet your specific needs and deliver an exceptional sound experience on your Windows 10 PC.
3. Resolving Driver Issues
In the dynamic realm of technology, encountering driver issues is not uncommon, and addressing them promptly is crucial to maintaining the seamless operation of your Blue Yeti USB microphone on Windows 10. In this section, we’ll explore a step-by-step approach to tackle any driver-related challenges that may arise during your audio journey.
When faced with driver concerns, your first destination should be the Device Manager—an integral tool within the Windows operating system designed to manage and monitor hardware devices. To access the Device Manager, right-click on the Start menu and select “Device Manager” from the list. Here, you’ll find a comprehensive overview of all the hardware components on your system.
Once in the Device Manager, navigate to the “Sound, video and game controllers” section, where the Blue Yeti is likely listed. Right-click on the Blue Yeti entry and choose “Update driver.” This initiates a search for the latest driver software, ensuring that you have the most recent version installed on your system. This process often resolves compatibility issues and ensures your Blue Yeti functions optimally with the latest improvements and bug fixes.
However, if the driver update within the Device Manager doesn’t alleviate the issue, it’s time to explore more advanced tools. One such tool is Driver Easy, a user-friendly application designed to automatically detect, download, and install the latest drivers for your devices. Download and install Driver Easy from their official website, and let the software scan your system for any outdated or missing drivers. This automated process can be a game-changer, especially if you’re not comfortable navigating the intricacies of driver updates manually.
In addition to third-party tools, tapping into the wealth of knowledge within online communities can be immensely beneficial. Platforms like Stack Exchange and Stack Overflow host vibrant Q&A communities where tech enthusiasts and experts congregate. Post your specific driver-related query, detailing the problems you’re encountering with your Blue Yeti, and chances are, you’ll receive valuable insights and potential solutions from the community.
Moreover, don’t hesitate to explore manufacturer-specific forums or the official Blue Yeti website for support. The manufacturer’s website often provides dedicated support sections, FAQs, and forums where users share their experiences and solutions to common problems. It’s a direct line to the source of your device, offering insights that might not be readily available elsewhere.
In essence, navigating driver issues involves a combination of in-built tools, third-party applications, and the collective wisdom of online communities. By following these steps, you not only address current concerns but also equip yourself with the knowledge to troubleshoot potential driver issues in the future, ensuring a smooth and uninterrupted audio experience with your Blue Yeti USB microphone on your Windows 10 system.
4. Troubleshooting USB Connection Problems
A seamless USB connection is the lifeline of your Blue Yeti USB microphone, and when issues arise, swift troubleshooting is essential to restore the uninterrupted flow of data between your device and Windows 10. In this segment, we’ll delve into practical steps to identify and address USB connection problems, ensuring a hassle-free audio experience.
When confronted with USB connection woes, your first line of defense is a straightforward yet effective solution—changing the USB port. USB ports can occasionally experience glitches or power irregularities, leading to connectivity issues. By simply plugging your Blue Yeti into a different USB port on your Windows 10 PC, you may circumvent the problem entirely. Opt for ports on the rear of your computer, as these are often directly connected to the motherboard and offer more stable power delivery.
If a shift in USB ports fails to resolve the issue, the next culprit on our troubleshooting checklist is the USB cable itself. USB cables, like any physical component, can degrade over time or suffer from manufacturing defects. To rule out cable-related problems, consider trying an alternative USB cable. This uncomplicated swap can be a game-changer, swiftly addressing potential faults and saving you considerable time and frustration.
In the event that neither a change in USB ports nor a different cable yields positive results, it might be worth considering the USB port’s health on your Blue Yeti. Over time, frequent plugging and unplugging can lead to wear and tear, potentially affecting the port’s stability. If this is suspected, contacting the manufacturer or seeking professional assistance may be necessary to ensure a lasting solution.
Additionally, while troubleshooting USB connections, it’s prudent to examine the USB port’s compatibility with your Blue Yeti. Some USB microphones, including the Blue Yeti, may function optimally with USB 2.0 ports, and using a USB 3.0 or later port could result in erratic behavior. Verify the specifications of your Blue Yeti and ensure compatibility with the USB port you’re utilizing.
By methodically addressing USB connection issues, you not only pinpoint the source of the problem but also gain valuable insights into the health of your Blue Yeti and its compatibility with your Windows 10 environment. Troubleshooting USB connections is a pivotal step in mastering the intricacies of your USB microphone, guaranteeing a stable and reliable link between your Blue Yeti and your PC for an uninterrupted audio journey.
5. Managing Background Noise and Enhancing Audio Quality
Invest in a pop filter, shock mount, or even explore the Blue Yeti’s unique design features to minimize background noise and improve overall sound quality. Adjust the gain knob according to your requirements for the best results.
6. Expanding Functionality
Explore the Blue Yeti’s versatility by using it for various applications such as video conferencing, music recording, or even in your video production business. Its stereo mode and different recording patterns make it an excellent choice for a wide range of activities.
7. Keeping Everything Updated
Regularly check for updated drivers and firmware on the official website to ensure your Blue Yeti is running smoothly. This proactive approach helps you avoid potential hardware limitations or compatibility issues with your operating system.
8. Seeking Help from the Community
If all else fails, don’t hesitate to seek advice from online communities, Q&A platforms, or the Blue Yeti’s official forums. The collective knowledge of these communities often provides accurate reports and solutions to common issues.
In conclusion, mastering the Blue Yeti USB Mic on Windows 10 involves a combination of hardware setup, software optimization, and troubleshooting techniques. With its ease of use, unique design, and international awards, the Blue Yeti is a great choice for users across various domains. So, dive into the world of crystal-clear audio and good luck on your journey with the Blue Yeti!